
Buenos días!! ¿Qué tal la semana? ¿Os ha sentado bien el cambio de hora? A mí no… jajajaja. Pero bueno, no hay problema, eso no impide que tengáis noticias mías como cada jueves :)
Soy muy fan de comprar la revista VOGUE cada mes y el mes de marzo venía acompañada por VOGUE COLECCIONES. Si le echáis un vistazo a estas revistas o a tiendas como ZARA, os daréis cuenta que esta temporada los nudos que antes aparecían en las mangas han pasado a los zapatos.
Morning!! What about your week? And what about time change? I really hate it.... hahahaha But... that's not a problem, I'm here again as every Thursday :)
I like buying VOGUE every month and in March it was together with VOGUE COLLECTIONS. If you take a look at these magazines or at ZARA, you'll realize that this season knots are not only at the sleeves. They are know at the shoes too.


Source: Stradivarius | Zara | Zara | Zara | Zara | Pull&Bear


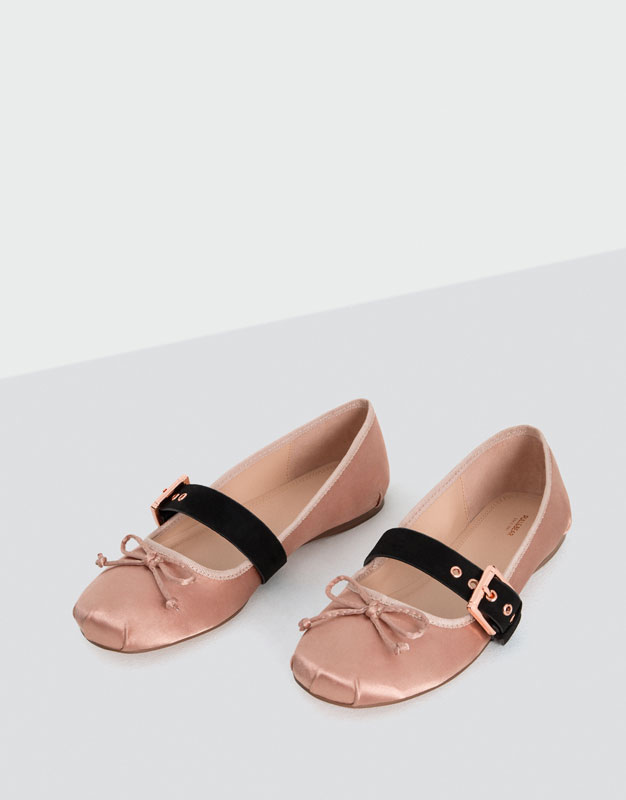
Source: Stradivarius | Zara | Zara | Zara | Zara | Pull&Bear
Partiendo de la base de que hacer un nudo es muy sencillo y que tenía un par de hebillas y unas bailarinas que no me gustaban me decidí por este DIY super sencillo :) ¡Vamos a por él!
Making a knot is easy and I had two buckles and a pair of ugly ballerinas, I decided to make this simple DIY :) Let's go for it!
¿Qué necesitamos?
- Unas bailarinas.
- Hebillas (estas son de un jersey antiguo)
- Retales de tela.
- Tijeras.
- Alfileres.
- Pistola de cola.
What do we need?
- A pair of ballerinas.
- Buckles (these are from an old sweater)
- Cloth remnants.
- Scissors.
- Pins.
- Hot glue gun.


PASO a PASO / STEP by STEP
1. Para empezar quita los adornos originales de las bailarinas, dejando la superficie preparada para colocar los nuevos adornos.
1. Firstly, remove the original decoration of the ballerinas so the surface is ready for the new decoration.

2. Prepara dos trozos de tela que se ajusten a la bailarina y que sean del mismo tamaño. Simplemente, haz un nudo :)
2. Prepare two pieces of cloth with the same size and make a knot :)

3. Fija la tela con alfileres en la posición que más te guste y empieza a pegar con cola caliente ambos extremos. También puedes añadir un poco de cola caliente en la zona del nudo.
3. Set the cloth with some pins just like you want it and glue it using hot glue in each side. You can also glue the knot.


4. Repite este proceso con las hebillas o cualquier otro adorno.
4. Repeat this step with the buckles or any other piece of decoration.
5. Eso es todo! Ya puedes darte un paseo con tus zapatos nuevos :D
5. That's all! You can go out for a walk with your new shoes :D


El resultado me parece que es muy original y perfecto para empezar la primavera. En cuanto a la modelo... no había manera de evitarlo. Me ha salido modelo la colega jajajaja
1. Firstly, remove the original decoration of the ballerinas so the surface is ready for the new decoration.
2. Prepara dos trozos de tela que se ajusten a la bailarina y que sean del mismo tamaño. Simplemente, haz un nudo :)
2. Prepare two pieces of cloth with the same size and make a knot :)
3. Fija la tela con alfileres en la posición que más te guste y empieza a pegar con cola caliente ambos extremos. También puedes añadir un poco de cola caliente en la zona del nudo.
3. Set the cloth with some pins just like you want it and glue it using hot glue in each side. You can also glue the knot.
4. Repite este proceso con las hebillas o cualquier otro adorno.
4. Repeat this step with the buckles or any other piece of decoration.
5. Eso es todo! Ya puedes darte un paseo con tus zapatos nuevos :D
5. That's all! You can go out for a walk with your new shoes :D


El resultado me parece que es muy original y perfecto para empezar la primavera. En cuanto a la modelo... no había manera de evitarlo. Me ha salido modelo la colega jajajaja
Con cariño,
S.
The result is really original and perfect for this spring. The model...she doesn't miss a photo opportunity. She is like a model hahahaha
Love,
S.


0 comments:
Publicar un comentario
No dudes en dejar tu comentario ;)