

Para empezar: ME MUDO OTRA VEZ. Mi próximo destino es Madrid así que tengo un piso nuevo para decorar y llenar de nuevos DIYs. La protagonista del que os quiero enseñar hoy es mi perrita Pati que también se muda y de regalo se lleva una camita nueva.
¿Qué necesitamos?
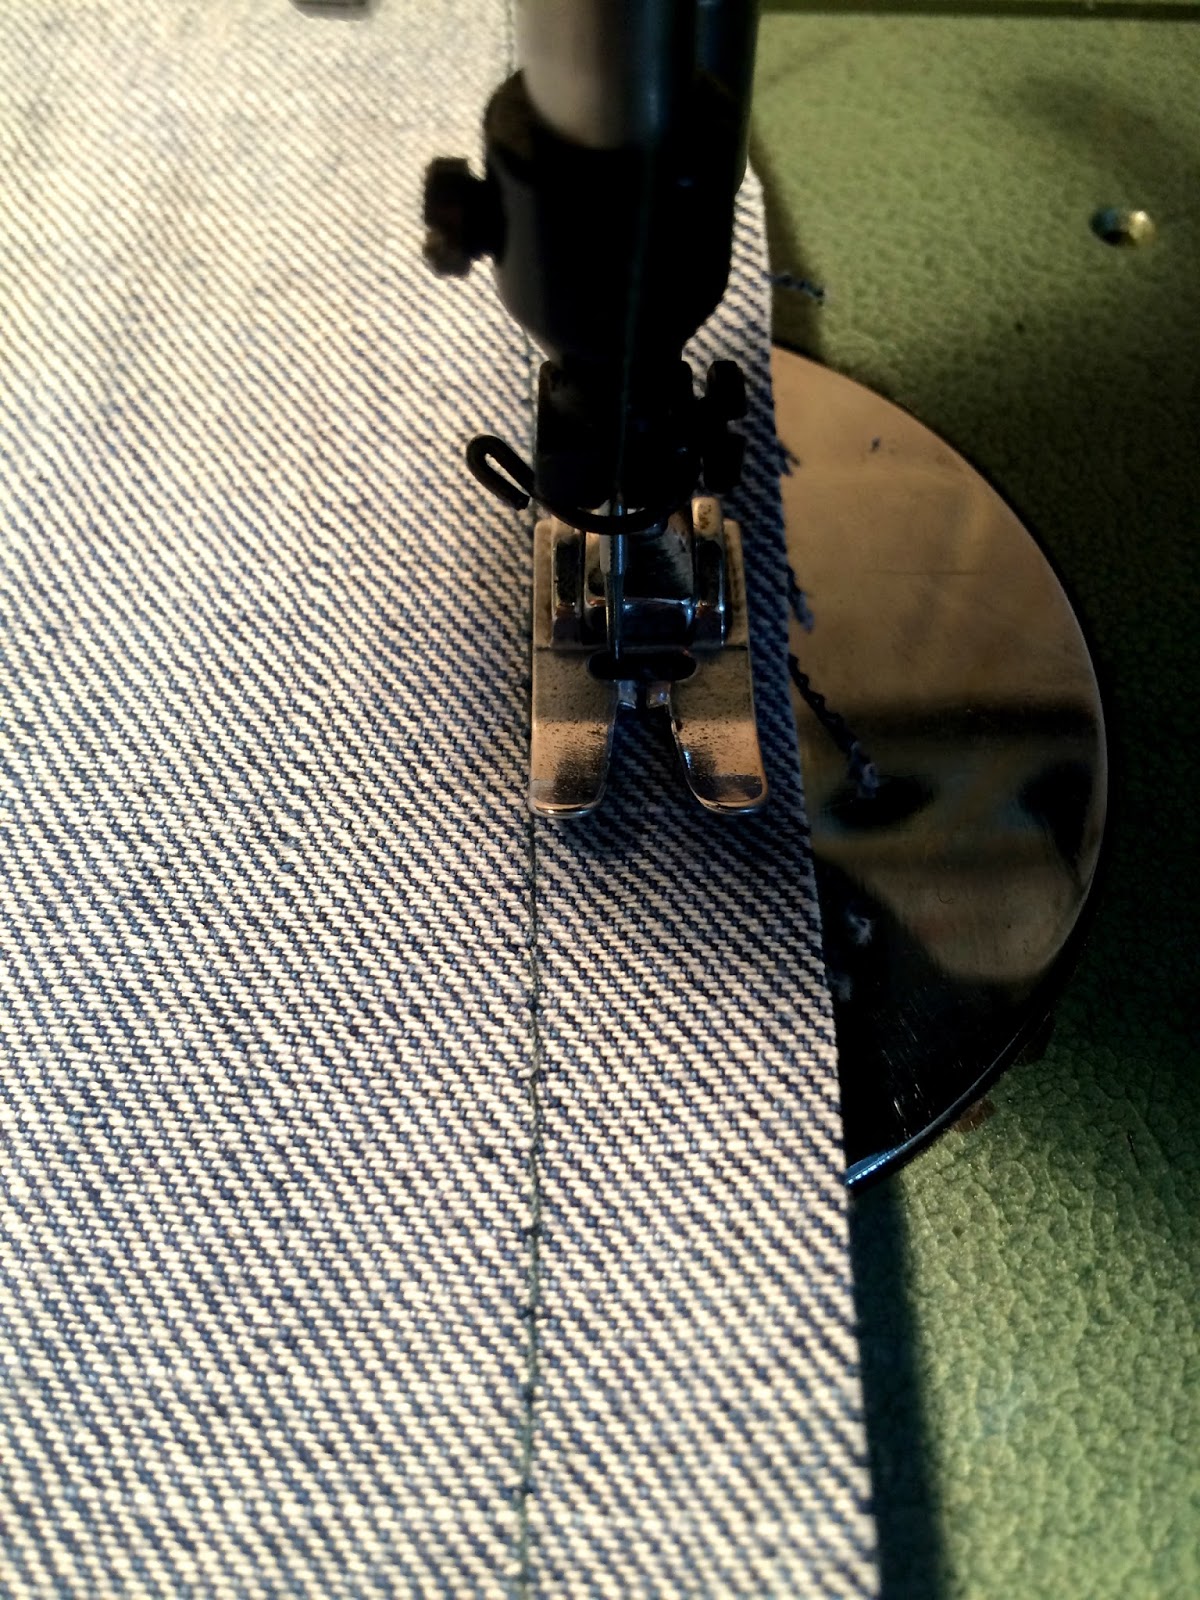
- Tela vaquera: yo escogí restos de vaqueros largos que había cortado para hacerme shorts y además, este tipo de tela es mucho más resistente a las fechorías de mi querida perrita.
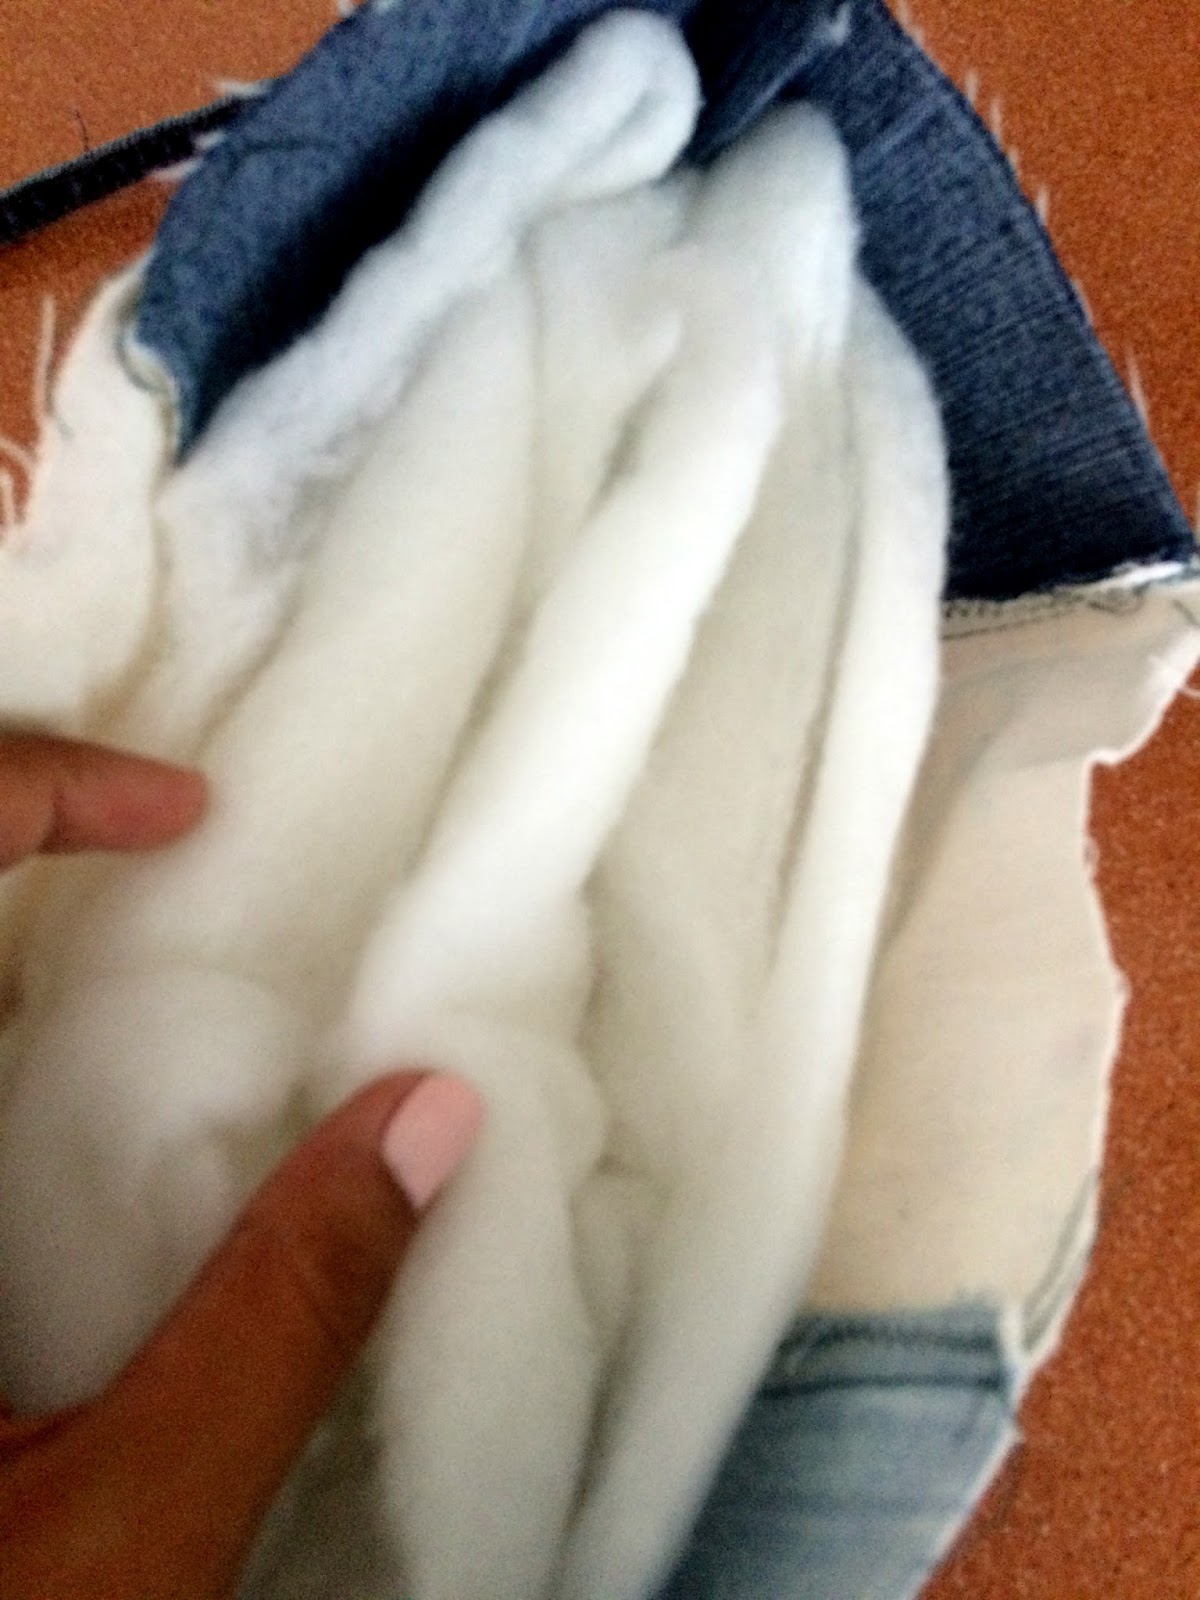
- Relleno de cojín.
- Hilo, aguja y máquina de coser.
- Tijeras.
- Velcro.
- Caja de madera: sinceramente, la encontré en una frutería.
PASO A PASO:
- Cortar la tela en función de la forma que le queramos dar a la camita y coser los trozos entre sí para tener por separado las distintas partes de la cama.
- Coser cada parte individualmente y rellenarla con el relleno de cojín. Es muy importante que cosáis muy bien todo para que con el tiempo el relleno no se salga. Yo añadí al respaldo y los laterales unas cintas vaqueras para poder anudarlos y que quedara bien sin la caja.
- Unir todas las partes y rellenar y coser la base de la cama.
- Añadir costuras pequeñitas en distintos puntos para evitar que el relleno se mueva cuando metamos la cama en la lavadora.
- Colocar la camita en la caja y fijar con unas tiras de velcro adhesivo en el fondo.
Y ¡LISTO! La parte más complicada es la de coser una vez esta dentro el relleno, yo sinceramente pedí ayuda con la máquina de coser.
¡Espero que os guste mucho! ¡¡Pati está encantada!!
Con cariño,
S.
··· ··· ··· ··· ··· ··· ··· ··· ··· ··· ··· ··· ··· ··· ··· ··· ··· ··· ··· ··· ··· ··· ··· ··· ··· ··· ···
First of all, I AM MOVING TO MADRID, so I have a new flat for new DIYs. This week I am going to show you a new DIY for my dog Pati.
What do we need?
- Denim: I chose this kind of cloth because is more resistant.
- Cushion padding.
- Thread, needle and sewing machine.
- Scissors.
- Adhesive hook-and-loop tape.
- Wooden box: I found this one in a fruit store.
- Cut the denim according to the form of the bed and sew each part of the bed separately.
- Sew each part of the bed and fill it with the cushion padding. It is important to sew each part carefully. I added two thongs in each side to knot the different parts of the bed.
- Add small needleworks at different points of the bed so the cushion padding cannot move from one side to another.
- Put the bed inside the wooden box and fix it with adhesive hook-and-loop tape.
THAT'S ALL! The most complicated part is to sew once everything is filled with the cushion padding.
I hope you like it! Pati is in love with her new bed!!
Love,
S.


0 comments:
Publicar un comentario
No dudes en dejar tu comentario ;)